This tutorial should be easy to follow and you don't need to know anything about Photoshop to use it. I'm using Photoshop 7 but I'll do nothing you can't do in at least Photoshop 6
Go to file, new and create a new banner - I always make mine 650 pixels by 160 pixels.
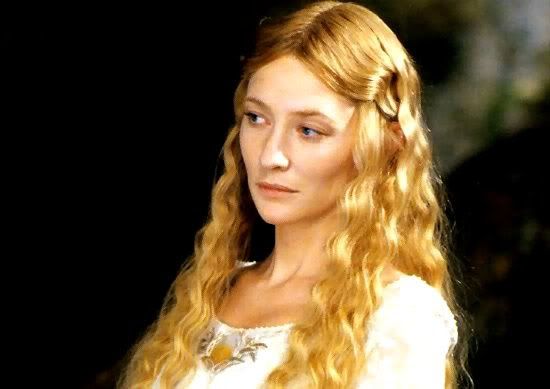
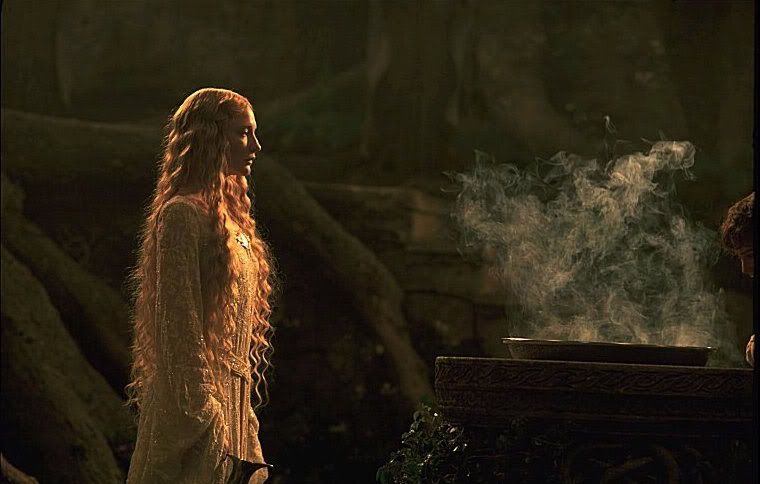
Find 2 pictures and save them then open them in photoshop. I choose these 2 pictures of Galadriel:
http://img.photobucket.com/albums/v51/f ... driel2.jpg
http://img.photobucket.com/albums/v51/f ... driel1.jpg
Now go to image, image size and resize them to fit onto the banner. Make sure you will have an overlap.
Take one of your images go to select, All. Then go to edit, copy. Click on your banner and go to edit, paste. Move your picture by dragging it to where you want it on the banner. Do the same with your other picture.
Now go to your layer palette. If it is not on your desktop go to Window, layers. Select the top layer that's this one:
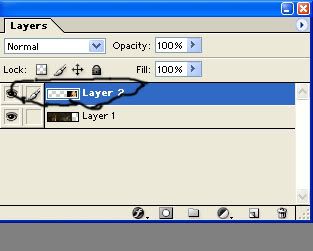
Now go to your side toolbar and click on the the select tool which looks like a square made out of dotted lines. You'll now see a bar at the top of the screen, where it says feather put in 15 px.
On the banner select the bits you don't want of the top picture and delete them. This will blend the pictures into each other.
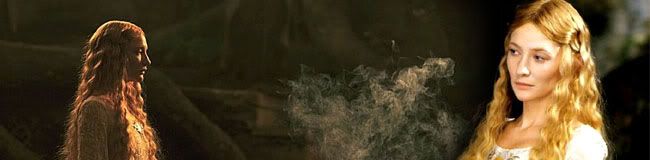
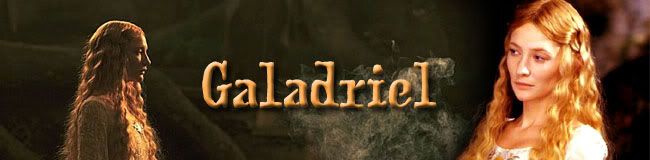
This is what I have so far:
You can leave it at that but I like to make the colours more similar for each picture.
Go to one of the layers and go to image, adjustments, colour balance. Here play around with the bars untill both pictures are the same shades of colour.
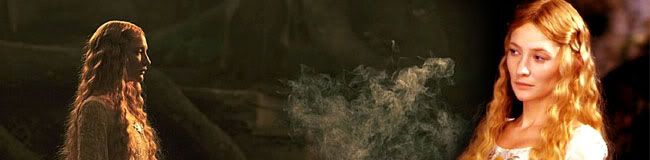
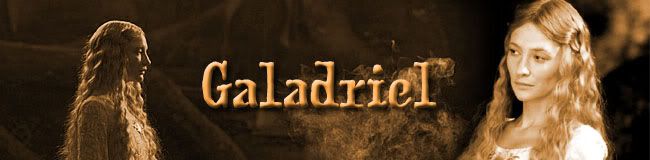
See don't you think that looks better?:
Go to layer, merge visible
You'll probably want to add text now. Go to the T tool on your tool bar at the left, click on the banner and type in your text.
At the bar at the top you can change the colour, size and font.
If you want to add effects to the text go to the f symbol on the layer pallet:
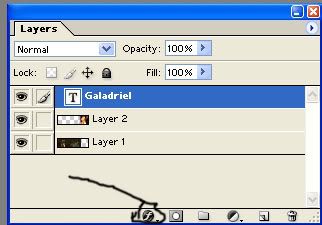
and go to blending options.
I selected "bevel and emboss" and "drop shadow"
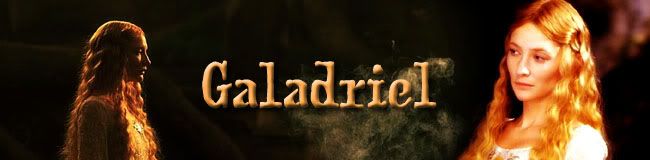
This is the banner I got:
And that's you finished.

If however you want to make it look even better here are a few ideas:
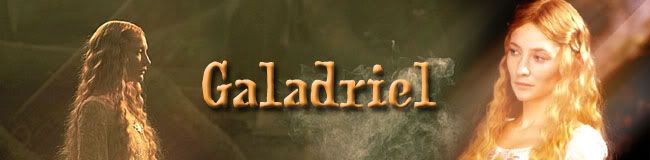
Go to image, adjustments, desaturate and then go to image, adjustments, Hue, Saturation
These are the settings I used, Hue 31, Saturations 52, Lightness 0.
And this is what I got:
To make it more glowing right click on your banner layer and click on duplicate. On this layer go to Filter, blur, gaussian blur and put in 3 for the radius.
Go back to the layer pallet and where it says normal click the down arrow this gives lots of layer styles. Set the style to "soft light"
Thats what this effect looks like:
To make a light streaming effect do the same as the last tutorial ecept instead of choosing gaussian blur pick motion blur. Make the angle 45 and the distance about 200. Now play around with the layer style and the opacity. I made the style "screen" and the opacity 100.
You can also add a texture like this one:
http://sky.ti-fi.com/textures/soarabove ... xture7.jpg from
http://sky.ti-fi.com
Just add it in the same way you added your pictures at the start. Then play aroung with the layer styles and opacity till you get something you like. I set it to hard light with 70% oppacity:


")


 </center>
 , but I like the results!!


 )
)


 Whenever I try, it selects the whole thing, not just the middle. Am I doing something wrong?
